
To say that this project has been a labour of love is something of an understatement, but I never was one for backing off from a challenge. I had never worked with chiffon before. If I had I would have tackled an easier garment, a plain scarf perhaps. Moreover, I didn’t actually have a pattern for a loose-fit shirt when I started, so my first task was to draw one up.
In my innocence, I thought that I would create the perfect loose-fit shirt by using my fitted-shirt block and eliminating all the darts, because that’s what it says in all the pattern-design books. Now, I have a medium sized bust but also quite a marked swayback. When I tried the no-darts approach, I ended up with a garment that a) ballooned over the small of my back and b) made me look about eight months pregnant. Back to the drawing board – several times.
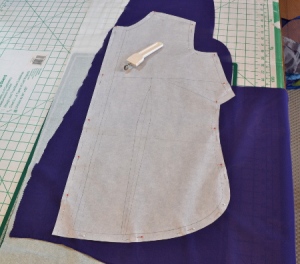
I realised that, as a ‘swayback’, all of my garments, even the loose-fit ones, will need to be darted. It is the only way to get a decent fit. Here is the fifth muslin (fifth!) that I made, though I opted for a three-sectioned back in the end.

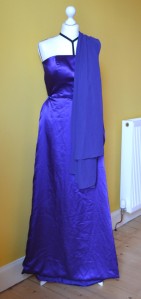
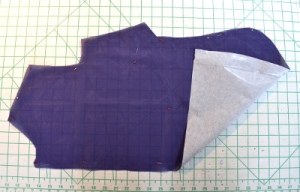
A couple of months ago, I bought this silk bridesmaid dress in a charity shop for £10. I dismantled it before remembering to take a photo. The chiffon shell is draped over the shoulder and there was more than enough fabric for this project. It was quite tricky to identify the right side and the grain of the fabric.

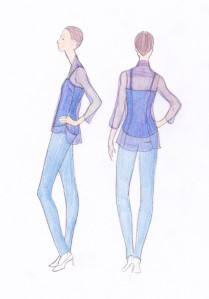
I made a quick illustration of the shirt I had in mind with a little camisole made from the silk satin underneath (still to be made).
Having read a ton of YouTube videos about how to handle chiffon – which put the wind up me, frankly – I gingerly laid out and cut the pattern pieces. I put the fabric on top of ironed tissue paper and pinned the pattern right through to it. It definitely make cutting out the pieces easier.
I tested several types of seams on spare scraps but the winner by a mile was a very narrow French seam for the darts, the side seams and the sleeves. It was a palaver but it was worth it. It looks really neat.

As well as working with chiffon for the first time, and making a loose-fit shirt for the first time, I also decided to make a double yolk for the first time (naturally!). This could have been make-or-break for the project but I held my breath and pulled it off, mostly due to such a good YouTube video that I’m adding the link:

I was uneasy about my ability to create neat buttonholes down a chiffon button band, and also unsure about how smoothly buttons would sit, so I opted for concealed poppers and this worked well but it was a lot of work. I stabilised the bands with silk ribbon.

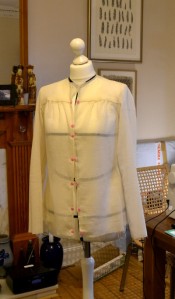
As with all sewing projects, putting the large pieces together gives the impression of an almost completed garment but it just isn’t so. It took ages to finish the button band, set in the sleeves with French seams, add a collar with collar stand and then the cuffs. But the hem! The hem took three attempts! I am glad I let my perfectionism win, though, because I am happy with the end result.

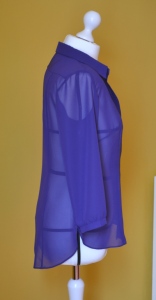
It has taken four weeks to make this shirt but I do have a sense of accomplishment. Furthermore, the total cost of this custom-fit, handmade silk garment comes to just £9.65, though this doesn’t take account of the hours of work. I think I’ll make a simple T-shirt next time.


Nice job! And a double yoke (as far as I know, yolks are only found in eggs? I may be wrong) looks so much better, especially in flimsy ravel prone fabric, which is just what chiffon is. With French seams as well your shirt will have a couture feel – not bad for a few bucks and some hours work.
LikeLiked by 1 person
Many thanks. It was a lot of work but I’ve discovered that charity shops are a great source of good quality fabric if you’re prepared to hunt a bit and are lucky enough to find something in a bigger size.
LikeLiked by 1 person